Friday, 14 January 2011

Post 14: Pre-Production Documentation

Location Recce's:
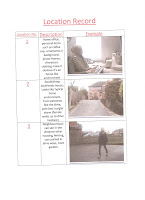
These documents are a series of pictures that are edited together, to get a shot of a location that is used in filming. This can be done in 'Windows PowerPoint'. Underneath the picture is the name of the location, the lighting that is in the room (i.e. how many lights there are on the ceiling or windows), the power source (the amount of plug sockets) and any permission needed to use the room for filming.


Shooting Schedule:


Script:
This is the original script that Jenna Pridgeon wrote, and we are both working on at the moment, titled 'Bruises'. The script is the main document that is seen by the actors to learn from. However, fundamentally, it is what people within the industry use to see if they want to make your film or if it has potential to be a film.
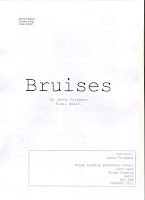
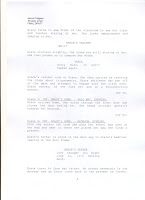
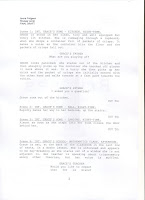
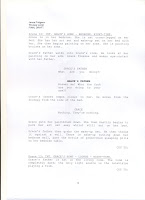


Costume List:

This is a list of all the costume items the cast member will need for each scene that requires it. the first line states what items of clothes are needed, the second says who it is needed for and the third line states what scenes they will be needed for.


Prop List:

Similar to a costume list, but with props that are required for the day instead of costume. It states who will provide what and for each scene that particular prop will be needed for.


Risk Assesment:


This is a documentation that is essential when it comes to making films. This is for the use of the the directors or whoever is in charge on the day of shooting to recognise what risks are around, and if action has been taken to eliminate the risk. The first line says the location, the second is the risk that is there, the third is the action to be taken, and the final line is the risk after action has been taken.


Character Profile:
This is a quick description of what the characters in the film are like, what they symbolise or stand for, what they give to the film etc. It then has a collage of what they would typically wear.


Grace:


Father:


Cast Profiles:

This is a short documentation of information about the cast in the film. On this, there is the age, height, measurements, eye colour, shoe size a brief description about what their hobbies are, and what they do in their day to day life, and 3 pictures of each cast member.


Zoe:


Ryan:


(Due to reliability, Ryan was later changed to Martin Pridgeon to play Grace's Father)


Technical recce's:


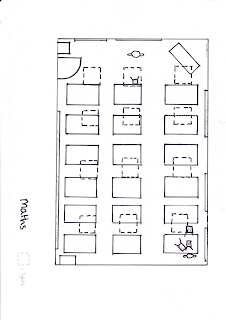
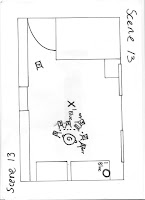
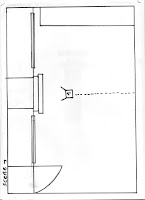
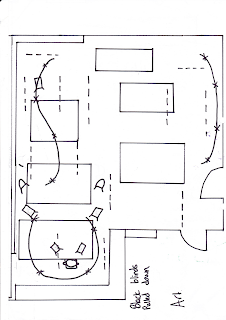
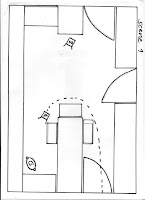
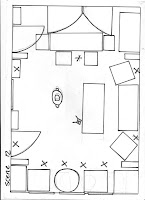
These are an areal drawing of each location we will be filming in for production. This includes everything from the furniture in the room, to the number of lights. On this, we draw where the camera's, lighting and actor will be placed for each scene in that location. This is to help us perceive where we may encounter issues with placing of the furniture or the type of lighting that may be in the room.


Storyboard:


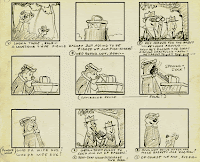
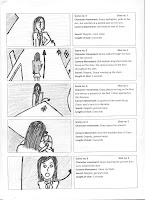
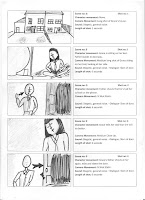
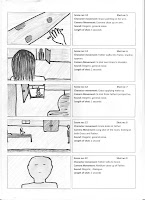
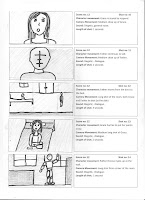
A Storyboard is a documentation where the shot and scene numbers, with camera and character movement, lighting and shot length are in the right hand box, and a drawing of the shot in the left. The arrows outside the left hand side boxes indicate camera movement, and the arrows inside the box indicate character movement. This is so we can get an idea of what the shot should look like, and how long it should take when we are filming.


Shot List:

This documentation in a list of all the information we need to film in each scene. The first line has the location in which we will be filming in it, the second line contains the scene number, the third line contains the shot number, and the final line contains a brief description, similar to the ones found in the locations recce's, of what is happening in each shot.


Saturday, 11 December 2010

Post 13: Advanced Production Skills Workshop 3


In this workshop, we were shown a powerpoint about 'source' and 'colour'.
In this we were to point out the differences between artificial light and natural light, and blue filters and an 85 filter.

We were shown two picture from the film 'Forrest Gump'.


In this picture, we came to the conclusion that the light was far too harsh, that it elliminated any shadows. This is how we can tell it was artificial light.


Then we were shown this picture and compared it with the other. In this, we can tell that it is natural lighting. We can see the horse in the background, which has strong sunlight on it's back, so we thought that maybe a diffusion was used over the frame, so the people in the foreground weren't too flooded with sunlight.


We were then shown a picture of Harry Potter,


As shown, the artificial lights above are the main source of light in the shot. But there is a man holding white card next to the actors. This is so the light is also bounced onto their faces, so shadows aren't created on their face, which would block out the actors face and facial expressions.
this makes the shot 'consistent with the source in the setting'.


We were then told how light creates an atmosphere, and we were shown pictures of corridors with different sources of light in them.


This is an example,


We used 3 point lighting to explain the different kinds of lighting used in this picture.


3 Point lighting consists of 3 different directions of light. Front, Back, and Side.


You can see the different sources of light in this picture of this corridor.


We re-created a corrior shot with our class, using the artificial lighting we have in the media corridor.


First we filmed with the normal artificial lights that are kept on, on a day to day basis.
Then we changed the lights so we had one focusing on Jenna, and one on in the background.


After this, we learned about colour of light. We were told about the different filters, and the effect they have on a shot.


We learnt about Gels and Lens'. We use a red gel or filter for a warmer looking picture, and a blue gel or lens for a colder effect.


One short film that Becky has shown us is called 'That Old One'. In this, whenever the main character tells a lie, there shows a green light. This then uses colour to add effect to a scene in the film.


Another film which uses colour to add effect is Harry Potter.


So, in terms of our short film, we had to think how we could creatively use light to add effect to our scenes. We decided to use a blue filter when our character 'Grace' is at home, as this is when she is feeling the least happy, the blue filter will give off a cold and unhappy vibe.

We will also use the barn doors on 'Grace's Father', as we want him to be anonymous. This will then block the light on the father's face in the shot, so we can't see his features clearly.

Friday, 10 December 2010

Post 12: Advanced Production Skills Workshop 2

In our workshop lesson, we learnt how to fully understand lighting, and the different skills and tools needed for variety in lighting. In these workshops, we use the PD150 SONY, to get used to the more advanced camera, and to acheive a better quality in our experiments. After the camera was set up, we set the lighting up, and learnt all about the different tools that can be used. First, we learnt about diffusion. We were shown each slot, including a 1/4, 1/2, full and a little full. These were the different qualities in diffusions that we could use. A quarter was the thinnest, and full was the thickest, depending on how much light you want to block out. The little full was an insert that you could use so you could have a full and a 1/4, and so on. Following this, we learnt about direction of light. This was the result from this experiment:


The problems we found with direction was the positioning of the light, as wherever we seemed to place the light, it was seen in shot. For example at 0:16 the light was seen in shot, and we also had to re-film under with a 1/4 diffusion, as the light was far too harsh on Kelly's face. Throughout, the light seemed too harsh, so it could look to washed out with light, rather than being able to see the full effect of the direction in which the light was projected from. After learning the basics of direction, we learnt how to manipulate it, using barn doors. The function of a barn door is to shape light in any direction you want it to. In this we also learnt how to 'bounce' light. We bounced the light off the ceiling, tin foil, and paper. We experimented with this, and this is how it turned out:


We had a problem with the tin foil bounce, as it didn't seem to have much of an effect, so we used paper aswell. This seemed to work to our advantage. We also experimented with the light with diffusions, as we found the light was too over-powering for some of the shots. Apart from this problem, and the problem with the camera taking time to focus in on Zak after having the black sugar paper fully over the light at 0:17, this task, I felt, went reletivley well. The strength of this experiment was the visible changes you could see in the intensity of light when moving the sugar paper.


After we had got to grips with the lighting, with inspiration from some pictures shown to us on the slideshow, we tried to mimic a 'Vogue' pose. Charlotte placed her hands in front of her face in an attempt to create shadows on her face. Also, in this video, we experimented with 'spot and flood'. Spot is where you focus all the light on one object (i.e. Charlotte) and flood is where you spread the light across the whole frame.


This workshop has helped me to understand how to work the different directions of lighting and the variety of diffusions we can use. In the production of 'Bruises', I will use this knowledge when controlling the strengths of light in each shot, specifically the shots where we need to create chadows of Grace's Father on the walls.

Saturday, 13 November 2010

Post 11: Advanced Production Skills Workshop 1


Last lesson, we were taught the style of 'Film Noir'. Film Noir is a style of film, created by Nino Frank in 1946. Although there were films made with the Film Noir style, this concept wasn't created until 1946. This style reflects American trends, in using Crime and Detective films, which was a contrast to the optimistic musicals and comedys that were around at this time.
This style was named film noir because of the dark, mysterious theme presented as such (left) in every sense, mood, point of view and tone.

A typical Film Noir story countained a cynical, heard-heartened, dis-illusioned man who encounters a beautiful, promiscuous, amoral, seductive "Femme Fatale" which literally means fatal female.
The female character would manipulate the man into commiting a crime, but they were often 'destroyed' by their plans, as they would fall in love with the man, and consiquently ending up with nothing. So, although Film Noir broke the convention that women were weaker than men, they still loose everything, and they suffer.


The Importance of Shadows in 'Film Noir'.


In class, we watched 'Rebecca', which show's us the importance of Shadows in film noir. Shadows created the illusion of mystery and show's the scale of importance on characters, shadows can created a special awareness, which makes the audience aware of the main character, by casting a shadow on everything else in shot.

There are two main types of shadows in Film Noir, Cast shadows and Attatched shadows.
Cast Shadows are the type of shadow when you put something in front of a light source and it casts a shadow, like a typical shadow from a person or object.
Attached Shadows is when a person or object is lit to highlight their importance, thus creating a shadow on anything that isn't of importance.

In class we also watched 'Lemon' by Hollis Frampton. In this video, Frampton play's with light on a lemon, to show the shape and texture of the lemon from different angles of lighting, and the different shadows that are cast upon it.


After watching this, we got into groups and created our own version of 'Lemon'.
After a few failed attempts, where are hands were seen in shot, which we had to correct, we created

Post 10: Job Roles Research


Task 1: Director: During Pre-Production, their job is to read over the script and to organise run-throughs with the actors, they are in charge of casting the actors, creating a shooting schedule and a call sheet. They are also in charge of a shotlist with help from the cinematography department.

During production, their job is to get the performance they want out of their actors.


Camera: During pre-production, along with the director, they are in charge of creating a shotlist. This department also create the storyboards, an equipment list and they book the equipment that will be needed for shooting.

Production: Their main job role is to film! They are in charge of deciding shot sizes, setting up the camera, framing and the composition of each shot.

There is a link between the Lighting and Sound department, as each roles share similar tasks.


Lighting and Sound: In pre-production they share the tasks of creating a risk assesment, the share the equipment list and technical recce's with the camera department. The sound department is in charge of soundtrack and any music they want to have permission from the labels and copyrights, the microphones, any voice overs they want to use must be done before production, special effect sounds and guide tracks.

In Production, they set up the lighting and sound equipment, the sound department monitor sound levels and positiong microphones.


Production Design: This department puts costume, makeup and set together. In Pre-Production, they are in charge of the location recce's, purely because it is important for the set designers. Then there is costume design, hair and make-up deisng and set designs or moodboards.
In Production they are in charge of continuity, i.e. taking pictures of the characters in costumes and make-up so they get it exactly right for the next shot, and monitoring the script.

Post 9: Script Feedback

When Becky Knapp came to visit again, she told us to assess each others scripts. We all had a look at everyone's scripts, and we had to give critical feedback on how they could be improved. Becky also had the chance to look at our scripts and gave feedback.
This feedback gave us the appropriate information to start improving our scripts even further.

My version of my script:


The general feedback I recieved was positive, my peers said they enjoyed my script, but was confused as to what genre it was. The format of the script was wrong, it was in the wrong font and I didn't have a front page cover for it.
When Becky talked to me about my script, she said there was some genre confusion, between comedy and drama. For a short film, she said it would be wise not to have the both, as we don't have enough time for character and plot development in the space of 5 minutes.

After this, we decided to work on Jenna's script, as her's was easier and more developed, so we could produce a better short film in the time we have.

Wednesday, 3 November 2010

Post 3a: target progress

1) Naturally, I am a creative person, but throughout the year I have been trying to push the boundries on my creative skills. I have shown this through script writing for my short film coursework. First of all, the idea for my script came to me in a lesson, a little bit out of the blue. But after hearing feedback, it changed significantly. So when it comes to my creativity, noticeably, I have been pushing myself more so this year, but can still use some work.

2) My second target was to keep up to date with homeworks and blogger deadlines. So far, I have been on time with my homeworks, and my bloggers haven't been too bad. There are times when my blog posts aren't completely finished, but they are still done to an extent. Last year, I was lazy with my blog posts and homeworks, which meant when it came to doing them, it was all last minute. Now I feel up to date and confident that my work is done.

3) When we were first told to use photoshop, I had no idea how to use it. So I was asking for help all the time. Since then I have used photoshop on many occasions, here is an example of this independent work:


4) I feel that my blogger has improved significantly during the course of the year. It is much neater, and more organised, and I am also fairly up to date, if not a few minor things missing. But compared to last year, I have become more organised and committed to making my blogger look presentable.

5) I haven't had the chance to really show my improvment in my interpersonal skills yet, as we haven't started on the coursework. But I have improved on taking all feedback on board.